Posts

Removing the LD from the Aixiz module

Image
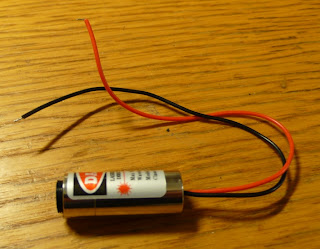
OK, I finally got on with this project. Next step for me was to remove the existing laser diode (LD) from the 650nm Aixiz module. Here's the 650nm 5mW Aixiz module before the operation. The original plastic lens and spring has been removed. The upper lens in the picture is the glass lens, which I'll use later for the burning laser. The module can be screwed open, but it is REALLY tight. They've used some white glue and I needed to use pliers to get it open. Using pliers leaves some little marks on the metal, but it doesn't matter. Using pliers to get the Aixiz module open. Next I needed to remove the original laser diode & driver electronics from the module. I used a nail and a hammer to kick the LD out. It will break but I don't need it. If you want to save the LD & the electronics, here's a good way to get it out without breaking it.  The original laser diode and the small driver PCB are visible. Here's the module after removing t

Aixiz module finally arrived!

Image
After waiting for a month, I finally got the module from Aixiz. I had been very busy anyway, so the delay didn't really matter. Here it is: the 650nm 5mW Aixiz module! I also got an extra lens for it, made of glass. I'm sure it's better suited for a laser CNC than the plastic one the module came with. This module is needed for collimation and heat sinking. I will put the laser diode inside the module and focus the beam with the glass lens. Next up: how to insert the 250mW laser diode into the Aixiz module.

Sketching the CNC

Image
So, at this point, I have a scanner that I'm going to use as a base, with a stepper controlling the movement along one axis. This is the scanner I'm going to use as the base. I also have a stepper motor, a metal rail and a pulley system that will be used to move along the other axis. A stepper motor from an old printer. A metal rail & old printhead. I was thinking about the possibilities how to create the XY-controlled CNC from these parts, and came up with three sketches. I admit, I'm very bad at drawing, but anyway, I decided to share these sketches with you. My first idea on how to construct the CNC was not a very brilliant one: First idea of the CNC, a very shitty one. The laser points up. The surface to be engraved would be held upside down over the CNC byt something, and the beam is pointed upwards from the scanner. Well, you can imagine how this would make the whole set-up and engraving process a pain in the ass. Especially with heavier ite

Laser diode driver circuit

Image
Here's the schematic of an adjustable laser diode driver circuit. It's based on this post by nickname Daedalus on the Laser Pointer Forums . This post has gotten so popular that people are referring to the circuit as a 'DDL circuit' (DDL is Daedalus' signature in the forums). It's just a constant current driver, but Daedalus was the one who popularized the use of this in DIY laser scene. From various sources in the internet, the voltage of the red 16x DVD burner led is found to be 3.2V and it's said (in various sources in the 'net) to withstand 250mA current. The laser output power is said to be 250mW. That is the power of the light coming out of the diode. It's not needed for these calculations. The circuit, like this one , is using two 10 ohm resistors in parallel for the limiting resistor. So the total resistance is 5 ohms, and the resulting wattage is 2x the wattage of the resistors . 5 ohms results in a maximum output current of 250mA.

Gutting a dead scanner

Image
This broken HP C7670A scanner should come in handy in this project! I'm sure I'll find the one stepper I've been looking for, and maybe I'll use this one as a base for the whole laser CNC thingy. The broken HP C7670A. So I opened it and removed the PCBs. They're going back to the electronic waste disposal... I like the way they tighten the belt in this scanner! This spring keeps the belt tight while travelling around with it. Remove the poisonous light bulb carefully... It's VERY fragile, like an uncooked spaghetti, and contains poisonous mercury. Mercury causes all kinds of nasty stuff and it can even make you homosexual! You heard right! Well at least if you're a bird, according to BBC . Be VERY careful with this lamp... I took the optics away from the scanner tray. Pretty. Dunno what to do with them yet. Some mirrors, a lens and the image sensor. Tray's now empty. I wonder how I will do the second axis... This might be a C

Gutting printers for steppers

Image
Immediately after I started drooling at the DIY CNC videos on the 'net, I found two printers in the garbage. What luck! There's the free stepper motors I was hoping for! Or so I thought. The models were HP Deskjet 5150 and Deskjet 656C. HP Deskjet 656C straight outta garbage. After all the trouble of carrying them home, I noticed they both had plastic optical guides next to the printhead pulley system. At first I was thinking "why do they need optics to guide steppers?" Then I understood the grave situation. There were no steppers. It seems that HP has found a cheaper way to get their precise printhead movement. They use DC motors with optical linear encoders to give feedback on the printhead's position. HP's optical guide for the printhead. I decided anyway I would gut the both printers for parts. I would probably be needing them for the mechanical construction. You need a torx screwdriver set to open these things. Every screw on these seems

Gutting a DVD burner for it's laser

Image
There are a ton of instructions on the net about ripping laser diodes out of old 16x DVD burners. Well, here's mine. Quite soon after starting this project, I found exactly what I needed: a 16X DVD burner from an old computer in the electric waste. Here's the poor thing before the operation. It's an LG GCC-4480B CD-RW/DVD ROM drive. The unsuspecting DVD burner before meeting it's fate. And here are the tools I need. Let's get to work. With these I was able to get everything out. Warranty's void now. Pull or cut the cabling to get the PCB out of the way. View from top. Laser lens is visible. View from bottom. Take out the screws connecting the rails of the laser module. Inside the top cover I found this cool little ring-shaped magnet. It's quite powerful for it's size, maybe a Neodymium magnet. It found a new home on my fridge. The magnet. And finally, here's the beef. The laser module with it's laser diodes.